Floating candles, with their mesmerizing glow and tranquil presence, have become a popular addition to home decor and special events. Their ability to float gracefully on water makes them ideal for creating a serene ambiance in any setting. While purchasing floating candles is an option, making your own can be a rewarding and creative endeavor. This article provides a comprehensive guide on how to make floating candles, covering the necessary materials, preparation steps, detailed instructions, and creative customization ideas. By the end of this guide, you’ll be equipped with the knowledge and skills to create beautiful floating candles that reflect your personal style.
I. Understanding Floating Candles
What Are Floating Candles?
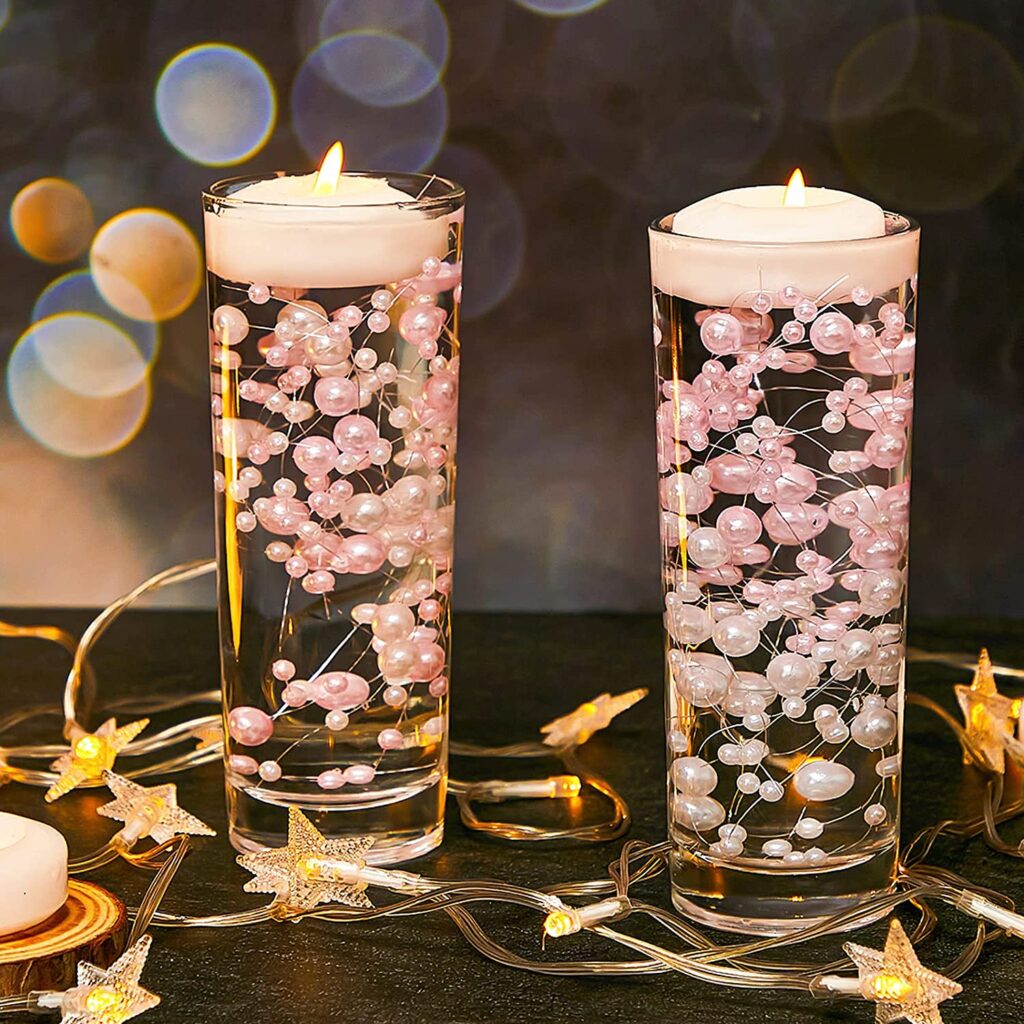
Floating candles are specially designed to float on water due to their unique shape and buoyant properties. Typically, they are disk-shaped with a flat bottom and rounded top, ensuring they remain stable and afloat. Floating candles are commonly used in decorative bowls, ponds, and fountains to enhance the aesthetic appeal of both indoor and outdoor spaces. They are popular choices for weddings, romantic dinners, and relaxation baths.
Benefits of Making Your Own Floating Candles
Making your own floating candles offers several advantages over buying pre-made ones. First and foremost, it is cost-effective. With a few basic supplies, you can create multiple candles at a fraction of the cost of store-bought options. Additionally, DIY floating candles allow for endless customization. You can choose your preferred colors, scents, and shapes, tailoring them to suit specific occasions or personal preferences. Lastly, the process of making candles can be a therapeutic and fulfilling activity, providing a sense of accomplishment and creativity.
II. Materials and Tools Needed
Essential Materials
- Wax: The type of wax you choose will affect the appearance and performance of your candles. Paraffin wax is a common choice due to its affordability and ease of use. Soy wax is a popular eco-friendly option, known for its clean burn and natural properties. Beeswax is another excellent choice, offering a natural honey scent and long burn time.
- Wicks: Pre-tabbed wicks are recommended for floating candles. These wicks come with a small metal base that helps them stand upright during the pouring process. Ensure the wicks are suitable for the diameter of your candles to achieve optimal burning.
- Dye: Candle dye can be used to add color to your floating candles. Liquid candle dyes, dye blocks, or even crayons can be used to achieve the desired hue. Remember that a little dye goes a long way, so start with small amounts and adjust as needed.
- Fragrance Oils: If you want to create scented floating candles, fragrance oils can be added to the wax. Choose high-quality, candle-safe fragrance oils, and follow the recommended usage rates to avoid overpowering the scent.
Tools and Equipment
- Double Boiler or Microwave-Safe Container: A double boiler is ideal for melting wax gently and evenly. If you don’t have one, a microwave-safe container can be used with careful monitoring.
- Thermometer: A thermometer is essential for maintaining the correct wax temperature. Different wax types have specific melting points, so a thermometer helps ensure safe and effective melting.
- Molds: Silicone molds, muffin tins, or specialized floating candle molds can be used to shape your candles. Silicone molds are particularly user-friendly as they are flexible and make candle removal easy.
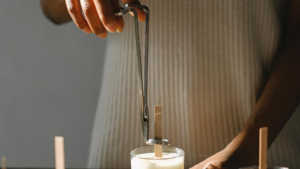
- Wick Holders: These devices keep the wicks centered and upright during the pouring and cooling process. You can use purpose-made wick holders or improvise with items like chopsticks or clothespins.
- Stirring Utensils: Heat-resistant stirring sticks or spoons are needed to mix dye and fragrance into the melted wax.
III. Preparation Before Making Floating Candles
Setting Up Your Workspace
Creating a dedicated workspace for candle making is essential for safety and efficiency. Choose a well-ventilated area to avoid inhaling fumes, and cover your work surface with newspaper or a protective cloth to catch any spills. Gather all your materials and tools beforehand to ensure a smooth workflow. Wearing protective gloves can prevent burns and skin irritation from hot wax, and having a fire extinguisher nearby is a good safety precaution.
Preparing the Molds
Before pouring the wax, ensure your molds are clean and dry. Any residue or moisture can affect the final appearance of your candles. If using metal or plastic molds, applying a light coat of mold release spray can help with candle removal. Place your wicks in the center of each mold, using wick holders to keep them in place. If your molds are deep, consider using adhesive to secure the wicks to the bottom.
IV. Step-by-Step Guide to Making Floating Candles
Melting the Wax
- Using a Double Boiler: Fill the bottom pot of your double boiler with water and bring it to a gentle simmer. Place the wax in the top pot and allow it to melt slowly, stirring occasionally to ensure even melting.
- Using a Microwave: If using a microwave, place the wax in a microwave-safe container and heat in short intervals (30 seconds to 1 minute), stirring between each interval. Be cautious of overheating and monitor the temperature closely.
- Temperature Control: Use a thermometer to monitor the wax temperature. Different waxes have different melting points; for example, soy wax melts at around 120-180°F (49-82°C), while paraffin wax melts at approximately 130-160°F (54-71°C). Ensure the wax reaches the appropriate temperature before proceeding to the next step.
- Adding Dye and Fragrance: Once the wax is fully melted, add your chosen dye. Start with a small amount and gradually add more until you achieve the desired color. Stir thoroughly to ensure the dye is evenly distributed. If adding fragrance oil, follow the manufacturer’s recommended usage rate, typically around 1 ounce of fragrance per pound of wax. Stir well to incorporate the fragrance evenly.
Pouring the Wax
Carefully pour the melted wax into the prepared molds, filling them to the desired level. To avoid air bubbles, pour slowly and steadily. If air bubbles do appear, gently tap the molds on the countertop to release them. Ensure that the wicks remain centered and upright throughout the pouring process. Adjust wick holders as needed to keep the wicks in place.
Cooling and Setting
Allow the candles to cool and harden completely. This can take several hours, depending on the size and type of wax used. Avoid moving or disturbing the molds during this time to prevent cracks or uneven surfaces. Once the candles are fully set, carefully remove them from the molds. If you encounter resistance, placing the molds in the freezer for a few minutes can help the candles release more easily.
Finishing Touches
Trim the wicks to approximately 1/4 inch (0.6 cm) above the candle surface to ensure a clean and safe burn. If the edges of the candles are rough or uneven, gently smooth them with a warm spoon or by rubbing them with a soft cloth. For added decoration, consider embellishing your candles with glitter, paint, or decals. Be sure any additional decorations are heat-resistant and safe to use with candles.
V. Creative Ideas for Customizing Floating Candles
Color Variations
Creating unique color variations can add visual interest to your floating candles. For multi-colored layers, pour the first color of wax and allow it to set slightly before adding the next layer. To achieve an ombre effect, gradually add more dye to the wax as you pour each layer, creating a gradient from light to dark. Using natural dyes, such as spices or herbs, can also provide beautiful, eco-friendly colors.
Scented Candles
Blending different fragrance oils can result in delightful and unique scents for your floating candles. Experiment with combinations like lavender and vanilla for relaxation, or lemon and mint for an energizing aroma. Ensure you follow safety guidelines for using fragrance oils, as some oils can be overpowering or cause irritation if used in excess.
Shapes and Sizes
While traditional floating candles are disk-shaped, you can experiment with different molds to create various shapes. Silicone molds come in an array of designs, such as flowers, hearts, or stars. Making mini floating candles is another creative option, allowing you to combine different sizes for a captivating display. Mixing and matching shapes and sizes can add an extra layer of visual appeal to your floating candle arrangements.
Decorative Elements
Adding decorative elements to your floating candles can enhance their aesthetic appeal. Dried flowers, herbs, or spices embedded in the wax can create a beautiful, natural look. Metallic flakes or glitter can add a touch of sparkle and elegance. Painting or stenciling designs on the surface of the candles can also personalize your creations. Just ensure that any decorative materials used are safe and will not interfere with the candle’s burning.
VI. Tips for Using and Displaying Floating Candles
Optimal Water Conditions
For floating candles to perform their best, ensure the water they float on is clean and at an appropriate depth. A shallow bowl may not provide enough buoyancy, while water that is too deep can cause instability. Adding decorative elements like flower petals, pebbles, or glass beads to the water can enhance the visual effect and create a stunning display.
Safety Considerations
Safety should always be a priority when using candles. Never leave burning candles unattended, and keep them away from flammable materials. Use appropriate containers, such as glass bowls or vases, to contain the water and candles. If using floating candles outdoors, be mindful of wind and weather conditions that could affect their performance or pose a fire risk.
Creative Display Ideas
Floating candles can be used to create beautiful centerpieces for dining tables and special events. They also make lovely additions to outdoor settings, such as pools, ponds, or fountains, adding a magical touch to evening gatherings. For themed displays, consider matching the candle colors and scents to the occasion. For example, red and green candles with pine scent for Christmas, or pastel-colored candles with floral fragrances for spring celebrations.
VII. Troubleshooting Common Issues
Candle Sinkage
If your candles sink instead of floating, it may be due to an imbalance in the wax-to-water ratio or the shape of the candles. Ensure your candles are not too heavy and have a wide, flat base. Adjusting the size and shape of your molds can help achieve the desired buoyancy.
Wick Issues
If your wicks won’t stay lit, they may be too short or improperly centered. Ensure wicks are trimmed to 1/4 inch before lighting and that they are properly secured in the center of the candle. If wicks are drowning in the melted wax, consider using thicker or more rigid wicks designed for floating candles.
Wax Problems
Uneven surfaces, cracks, or air bubbles can occur if the wax cools too quickly or is poured too rapidly. To prevent these issues, pour the wax slowly and allow it to cool gradually at room temperature. If air bubbles persist, gently tapping the molds on the countertop can help release them. For cracked surfaces, reheating and smoothing the wax can provide a fix.
VIII. Conclusion
Recap of Key Points
Making floating candles at home is a cost-effective and creative way to add beauty and ambiance to any space. By understanding the materials and tools needed, preparing your workspace, and following the step-by-step instructions, you can create stunning floating candles tailored to your preferences.
Encouragement to Experiment
Don’t be afraid to experiment with different techniques, colors, scents, and decorative elements. Candle making is a versatile craft that allows for endless customization. Each creation is an opportunity to express your creativity and enhance your surroundings.
Final Thoughts
Crafting your own floating candles combines the art of candle making with the tranquility of water, resulting in a beautiful and soothing addition to your home or special events. Whether you are making candles for personal use or as gifts, the process is enjoyable and rewarding. Embrace the creativity and satisfaction that comes with making your own floating candles, and enjoy the peaceful glow they bring to your space.

