Candle making is a delightful and rewarding craft that allows you to create personalized candles tailored to your preferences and style. Whether you’re looking to unwind with soothing scents or add ambiance to your home, making candles from scratch is a fulfilling hobby that anyone can enjoy. In this comprehensive guide, we’ll take you through each step of the candle making process, from selecting materials to pouring and setting your candles. By following these easy-to-follow instructions, you’ll be well on your way to crafting beautiful and fragrant candles right in the comfort of your own home.
Materials and Equipment

Before you begin your candle making journey, it’s essential to gather all the necessary materials and equipment. Here’s a detailed list of what you’ll need:
- Wax: Choose from a variety of waxes, including soy wax, beeswax, paraffin wax, or a blend of these options. Each type of wax offers unique characteristics and benefits, so consider your preferences and intended use for the candles.
- Wicks: Select wicks that are appropriate for the size and type of candle you plan to make. Wicks come in different sizes and materials, such as cotton or wood, and choosing the right wick is crucial for proper burning and performance.
- Fragrance Oils or Essential Oils: If you want to add scent to your candles, you’ll need fragrance oils or essential oils. These oils come in a wide range of scents, from floral and fruity to woody and spicy, allowing you to create custom fragrance blends to suit your preferences.
- Colorants: While optional, adding colorants to your candles can enhance their visual appeal and complement your home decor. Candle dyes, color blocks, or even natural ingredients like herbs and spices can be used to tint the wax and create beautiful hues.
- Containers: Choose containers to hold your candles, such as glass jars, tins, or ceramic vessels. The size and shape of the containers will influence the final look of your candles, so select containers that align with your aesthetic preferences.
- Double Boiler or Melting Pot: A double boiler or melting pot is essential for melting the wax safely and evenly. This equipment helps prevent the wax from scorching or burning and ensures a smooth melting process.
- Thermometer: Use a thermometer to monitor the temperature of the melted wax. Maintaining the correct temperature is crucial for successful candle making, as it affects the fragrance throw, burn quality, and overall performance of the candles.
- Stirring Utensil: A stirring utensil, such as a wooden spoon or metal whisk, is needed to mix the fragrance oils, colorants, and other additives into the melted wax thoroughly.
- Pouring Pitcher: A heat-resistant pouring pitcher is essential for transferring the melted wax into the prepared containers. Look for a pitcher with a spout for precise pouring and minimal mess.
- Heat Source: You’ll need a heat source, such as a stove, hot plate, or electric wax melter, to melt the wax. Ensure that your chosen heat source is safe and stable and that you have adequate ventilation in your workspace.
Step-by-Step Guide
Now that you’ve gathered all the necessary materials and equipment let’s dive into the candle making process:
- Prepare Your Workspace
- Set up your workspace in a well-ventilated area away from drafts, pets, and children. A kitchen or dedicated crafting space is ideal.
- Cover your work surface with newspaper, parchment paper, or a disposable tablecloth to protect it from spills and drips. This will make cleanup much easier.
- Arrange your materials and equipment within easy reach for convenience and efficiency. Having everything organized and accessible will streamline the candle making process and make it more enjoyable.
- Measure and Melt the Wax
- Begin by measuring the desired amount of wax for your candles, taking into account the size and number of candles you plan to make. Use a kitchen scale or measuring cup for accurate measurements.
- Use a double boiler or a melting pot to melt the wax gently over medium heat. This method ensures even melting and helps prevent the wax from scorching or burning.
- Stir the wax occasionally with a stirring utensil to promote even melting and prevent hot spots. Be patient and avoid rushing the process, as overheating the wax can affect the quality of your candles.
- Prepare the Containers and Wicks
- While the wax is melting, prepare your containers by cleaning and drying them thoroughly. Remove any dust, debris, or residue that may interfere with the adhesion of the wax.
- If using pre-tabbed wicks, adhere them to the bottom center of each container using a small amount of melted wax or a wick sticker. Make sure the wicks are straight and centered to ensure an even burn.
- For containerless candles, such as pillar candles, secure the wick in the center of the mold using a wick holder or similar device. This will prevent the wick from shifting or tilting as the wax sets.
- Add Fragrance and Colorants (Optional)
- Once the wax has melted completely, remove it from the heat source and allow it to cool slightly. The optimal temperature for adding fragrance oils or essential oils is typically between 160°F and 180°F (71°C and 82°C).
- If desired, add fragrance oils or essential oils to the melted wax, stirring gently to distribute the scent evenly. Start with a small amount and adjust to your preference, as some fragrances may be stronger than others.
- Add colorants sparingly to achieve the desired hue, mixing thoroughly until the desired color is achieved. Keep in mind that a little goes a long way, so start with a small amount and add more as needed to achieve the desired shade.
- Pouring the Wax
- Check the temperature of the melted wax to ensure it’s at the optimal pouring temperature, typically between 150°F and 180°F (65°C and 82°C). This temperature range ensures the wax will pour smoothly and evenly into the containers.
- Carefully pour the melted wax into the prepared containers, filling them to the desired level. Avoid overfilling the containers, as this can cause the wax to overflow when the candle is lit. Use a steady hand and pour slowly to minimize spills and drips.
- Setting and Cooling
- Once all the containers are filled, allow the candles to cool and solidify completely before handling or moving them. This process typically takes several hours, depending on the size and type of candles.
- Avoid disturbing the candles while they’re setting to prevent surface imperfections or uneven cooling. Keep them in a draft-free area at room temperature for best results.
- Once the candles have cooled, trim the wicks to approximately ¼ inch (0.6 cm) using scissors or a wick trimmer. Trimming the wicks helps promote a clean, even burn and prevents smoking or sooting.
Tips and Safety Precautions
Candle making can be a fun and enjoyable activity, but it’s essential to take proper precautions to ensure your safety and the quality of your candles:
- Always work in a well-ventilated area to prevent the buildup of fumes and vapors from the melting wax and fragrance oils.
- Use caution when handling hot wax and equipment, as they can cause burns or injuries if mishandled.
- Keep a fire extinguisher, baking soda, or sand nearby to extinguish any fires that may occur during the candle making process.
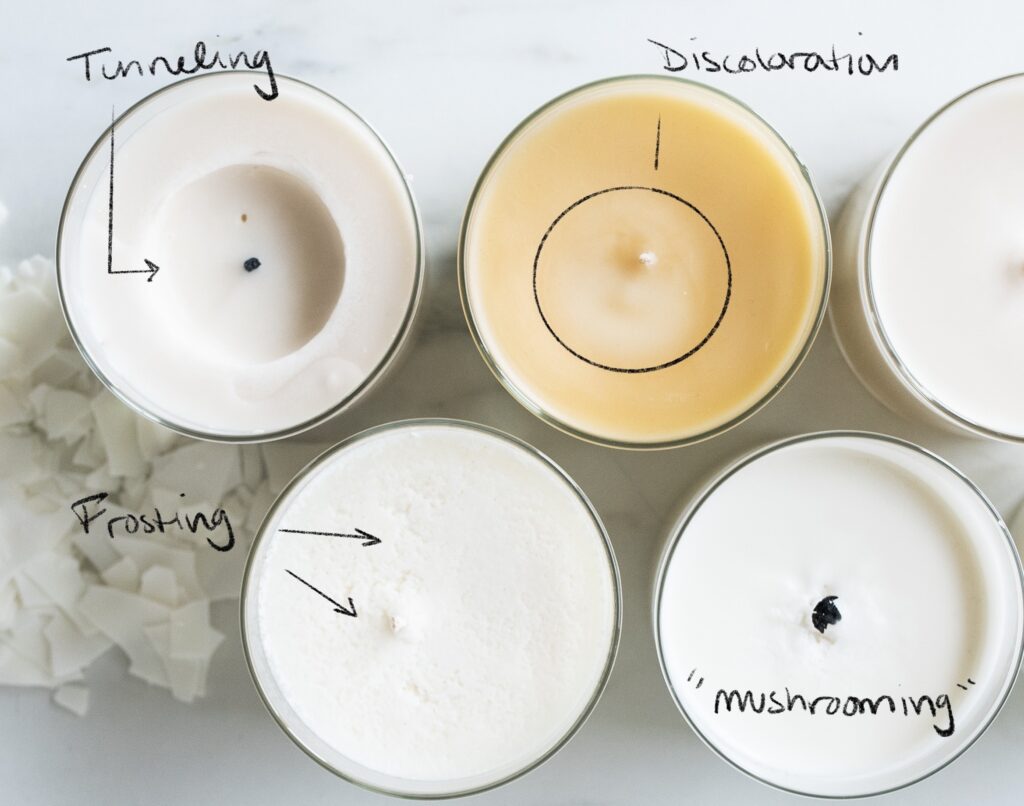
- Store your candles in a cool, dry place away from direct sunlight and heat sources to prevent melting, warping, or discoloration.
- Test your candles for safety and performance before using them extensively, especially if you’ve made any changes to the ingredients or techniques.
Conclusion
Congratulations! You’ve successfully completed your first batch of homemade candles. With a little practice and experimentation, you’ll soon become an expert candle maker, creating beautiful and fragrant candles to enjoy yourself or give as gifts to family and friends. Remember to have fun, be creative, and embrace the joys of candle making as a fulfilling and rewarding hobby. Happy crafting!


